
Vinyl Kitchen Transformation
When people say the word ‘vinyl’, it usually means one of two things:
They are old and about to bore you witless with stories of how music was better when Led Zeppelin were still performing back in medieval times.
Or:
They are bearded and young and about to bore you witless with stories about how they tracked down a pristine copy of Led Zeppelin IV in a tiny shop down a narrow alley in Marrakesh after a tip-off by an old, creaking man (who may or may not have been Robert Plant) they met in a tiny Prague café off Wenceslas Square that serves kopi luwak coffee and which only genuine locals know about. Have you ever been to Prague? Oh, you must. But go in the winter; it’s so much more authentic. And doesn’t music sound so much better off a record than when you stream it from a soulless corporation?
Makes you want to go and live up a mountain for the rest of your life on your own, doesn’t it?
I raise the v-word here because while many people won’t have a lick of vinyl in their music collection, many people do have it in their houses. In fact, it’s a common material used to cover kitchen cabinets. (You were wondering where this was all heading, weren’t you?)
Vinyl has its advantages. It is easy to clean and, for a while at least, quite robust. If you have a house full of young kids whose sole purpose in life is to commit terrible violence upon your furniture, floors and cabinets (pretty much any child under the age of five who has access to crayons and/or tomato ketchup), vinyl is the kind of armour that can be very appealing.
It does have its drawbacks, though. Over time, it loses its structure and it can start to flake, split and come away from the wood substrate below. It can do so in small chips or in great swathes. It’s often caused by steam and damp getting under the vinyl, eventually causing it to peel off.
When that happens, you might think you have to replace the kitchen.
Not so.
With care and in the right hands (preferably mine), your kitchen can be transformed from a plastic pantry into (possible bias alert) an elegant hand-painted wonderland.
Hand painting vinyl kitchen cabinets and doors
I recently hand-painted a vinyl kitchen for a client who wanted a change of colour. Also, on a corner of one of the doors, some vinyl had separated and broken off.
If the vinyl is still intact and adhering well to the wood, you can paint over it. But you do need to use the appropriate primer. One of the advantages of vinyl in the kitchen is that things don’t easily stick to it. That makes it hard for five-year-olds to do permanent damage with their latest ketchup masterpiece, but it also means you can’t just paint away as a kitchen painter. Nevertheless, if you know what you’re doing, it’s a straightforward process.
The challenge in this kitchen was making the damaged door look just as pristine as all the others. Merely painting over the damaged section would look ugly and obvious. The solution was to remove the remaining vinyl and paint over the MDF the door was made of. Easy enough, you’d think, especially as the vinyl had already started to come off of its own accord. But, as always, there is a gotcha.
I used a heat gun to melt the underlying glue, allowing me to peel off the plastic. In most places, the glue melted quickly and vinyl came off easily. But in the centre of the door, the glue was stubborn. Very stubborn. Like trying to get a rugby ball off an All Black stubborn. It got to the point where I started to think something other than glue was keeping the vinyl on. Like an ancient curse or something.
But I’m Welsh and we don’t care for that sort of nonsense. Eventually the vinyl gave in to my Gallic charm and, er, “encouraging” language. Unfortunately, a patch of the wooden surface came away along with it. That sounds more alarming than it is. It’s not like the door had a deep canyon torn out of it. Not at all. But it was noticeable nevertheless. This is where you earn your keep as a hand-painter of kitchens. My job is to deliver a flawless finish on a perfectly smooth door. And that’s what the client got.
It’s not uncommon for kitchen doors to have nicks and scratches on them when they’ve been in service for a while. It’s life. Kitchens are living places that are used daily. So repairing those blemishes is part of the job. I use a high-grade filler to fill in any imperfections before I apply any paint. I’ll sand the first application of filler down and often apply a second layer, to make absolutely sure any marks are gone. It’s more work, but the biggest joy in my job is seeing the delight in a client’s eyes when they see the finish of their kitchen for the first time. So the work has to be flawless.
In this particular case, the client was thrilled with not only the look of their kitchen but also the fact that they couldn’t see any difference between the door that needed to be stripped of vinyl and the other doors that didn’t.
Here is the process in pictures:

You can see the vinyl peeling off in the bottom corner, revealing the MDF below.

The vinyl removed. (Notice the uncanny resemblance it bears to someone after they have tried to take the ball off an All Black.)

You can see where the glue was obstinate. (But I am more obstinate.)
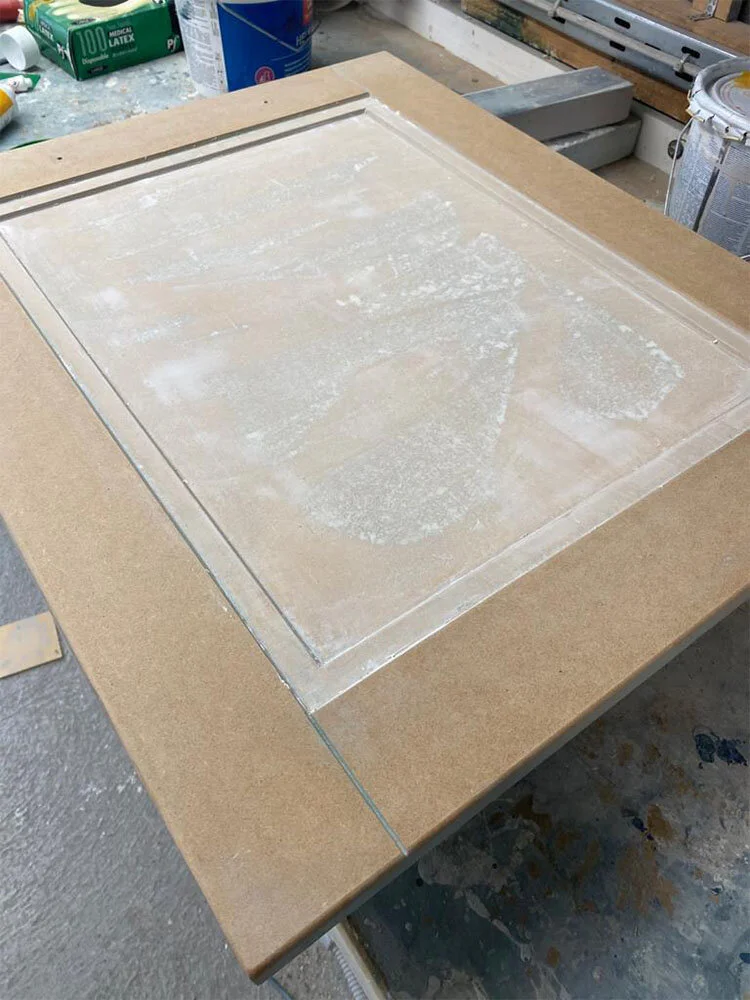
Filled in and sanded down to a smooth surface once more.
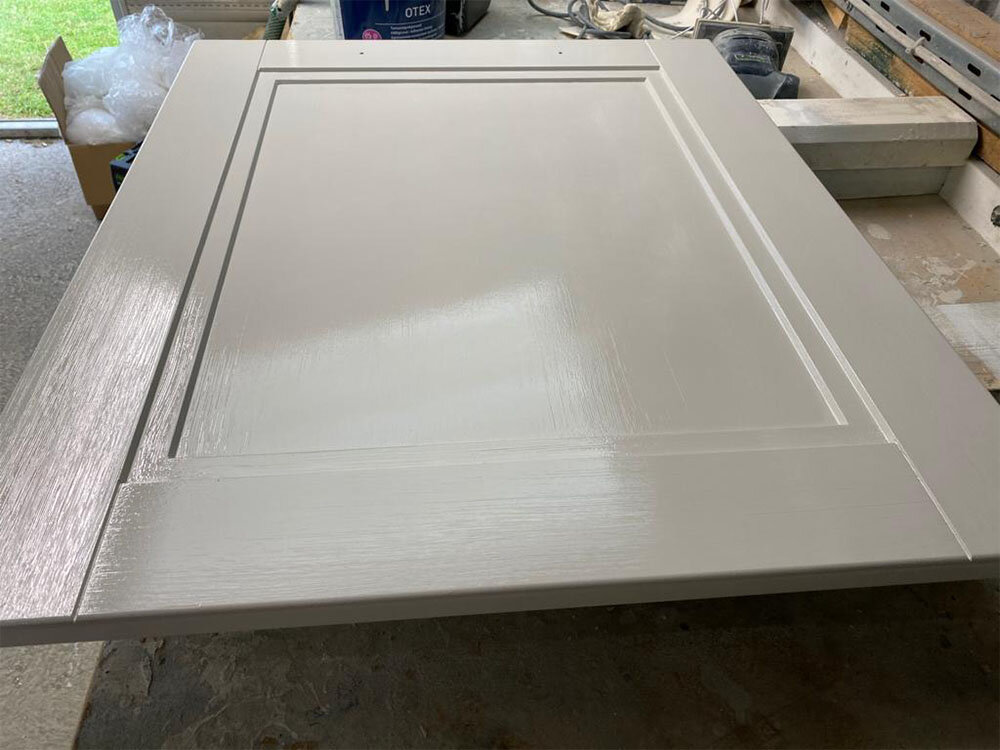
The painted kitchen door.

Back in place with a perfect finish and indistinguishable from the other doors.